Events
Codename Engine's charter comes with 9 built-in events. To help you get some basic effects without having to script much.
- HScript Call
- Camera Movement
- Add Camera Zoom
- Camera Modulo Change
- Camera Flash
- BPM Change
- Scroll Speed Change
- Alt Animation Toggle
- Play Animation
HScript Call
When this event is ran, it calls the function of the same name as the first parameter in any of the loaded scripts.
It can mainly be used if you wanna trigger a specific function at a specific time without having to code it like if(curBeat == 69).
Arguments are passed as strings. You may need to convert it.
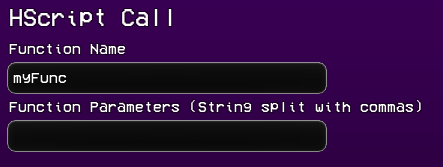
- Function name: The function you want to call.
- Function parameters: The functions arguments, each argument is separated by a comma.
Camera Movement
This event is used to focus on a specific character, can be used to show the current character who is singing, and for extra movement during sections of a song where no one is singing.
In Legacy FNF charts this used to be the mustHitSection which moved the camera. This event is automatically created when using Legacy FNF charts in Codename.

- Camera Target: The character you want the camera to focus on.
Add Camera Zoom
When this event is ran, the selected camera in the Camera parameter zooms the amount in the Amount parameter. This can be used to create intensity in a song where it would feel normally static without it.
Note that this does not change the zoom of the camera permanently. It zooms back to the value of defaultCamZoom.
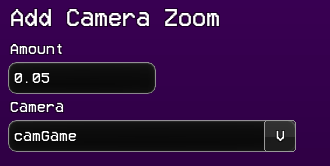
- Amount: The desired zoom amount.
- Camera: The camera you want to zoom. (camGame or camHUD)
Camera Modulo Change
This event changes the amount of beats before the camera bumps. This can be used to create a similar effect to M.I.L.Fs drop where the camera bumps every beat, without having to script anything.
In the image below, the event will make the camera bump after every 4th beat
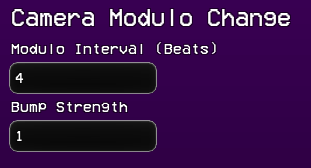
- Modulo Interval (Beats): The amount of beats before the camera bumps.
- Bump strength: The strength of the bump.
Camera Flash
This event simply runs the flixel function to flash the camera.
This can be used to add a simple camera flash without having to type camHUD.flash(FlxColor.WHITE, 0.6); whenever you want to add a camera flash.
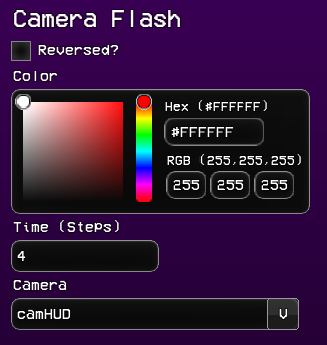
- Reversed?: If checked, the camera will fade into the color instead of flash and fade out.
- Color: The color of the flash.
- Time (Steps): The amount of time it takes for the flash to fade out in steps.
- Camera: The camera to flash.
BPM Change
This event simply changes the BPM of the Conductor. Making sure everything stays in sync with your song.
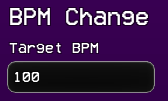
- Target BPM: The BPM you want to change to.
Scroll Speed Change
This event changes the scroll speed of all the strumlines. It can be used to increase or decrease difficulty mid-song. It also has a parameter to tween the scroll speed, making it feel less snappy and much smoother.
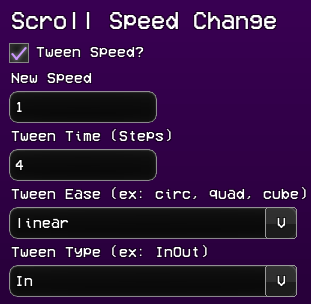
- Tween Speed?: If checked, the scroll speed will be changed with a tween.
- New Speed: The new scroll speed the strumlines will change to.
- Tween Time (Steps): The length of the tween in steps if
Tween Speed?is checked. - Tween Ease (ex: circ, quad, cube): The style of easing the tween will use.
- Tween Type (ex: InOut): The easing direction of the tween.
Alt Animation Toggle
This event toggles if the chosen strumlines characters will use their animation with the -alt suffix to the animation for their sing poses and/or their idle poses.
This is used in the christmas week, when the parents take turns singing.
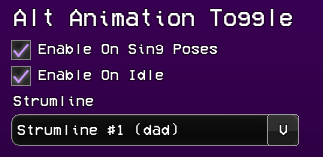
- Enable On Sing Poses: If checked, the characters will use their alt singing animations.
- Enable On Idle: If checked, the characters will use their alt idle animation.
Play Animation
This event plays a characters animation. Can be used to make a small cutscenes or small dialogue moments within the song.
This event is used in Stress when Tankman says "Heh. Pretty good!".
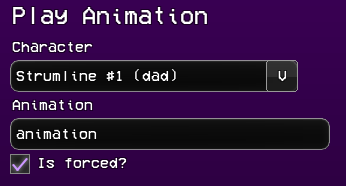
- Character: The strumline (and its respective character), to play the animation on.
- Animation: The name of the animation to play.
- Is Forced?: If checked, the animation will play even if there is another animation happening.
Custom Events
This tutorial assumes that you already know the basics of using haxeflixel, and scripting in codename. If not please take a look at Scripting.
Your average custom event will usually have 3 files
- A JSON file (
.json) in./data/events/. - A HScript file (
.hx) in./data/events/. - (Optional) An image file (
.png) for the charter icon in./images/editor/charter/event-icons/
Each file should be named the exact same.
The JSON file (.json) is to define the parameters of the event. The HScript file (.hx) file is used to handle the event, and the image is the icon that will be used in the charter.
I'm going to show a Play Sound event and explain what is going on in each file.
First lets start with the json file inside .data/events/Play Sound.json
{
    "params": [
        {
            "name": "Sound File Path",
            "type": "String",
            "defaultValue": ""
        },
        {
            "name": "Volume",
            "type": "Float(0, 1, 0.1, 2)",
            "defaultValue": "1"
        },
        {
            "name": "Looped",
            "type": "Bool",
            "defaultValue": "false"
        }
    ]
}
Alright lets break this down.
Each parameter in the params array should have a name, type, and defaultValue.
The name is just the name that will be displayed and what you will check for in your script.
The types that you can use are:
Bool: A checkmark that can be toggled on and off.Int(min, max, step): A box that can only contain whole numbers.Float(min, max, step, precision): A box that can contain decimal numbers with a desired precision.String: A textbox the user can type anything into.StrumLine: Let's the user pick a strumline that is passed into the script.ColorWheel: Create's a color wheel that will return a color into the script.DropDown([choices ...]): Creates a dropdown with the values defined in the array.
And the defaultValue is self explanatory, but it's what is automatically set for the value of the parameter.
Next let's move onto the script itself in .data/events/Play Sound.hx.
First lets make the onEvent function:
function onEvent(event) {

}
To get our event we need to check if the name is the same as the Play Sound event.
We can check that by checking event.event.name
function onEvent(event) {
  if(event.event.name == "Play Sound")
  {

  }
}
Now we need to get the parameters from the event, so we can play the correct sound.
We can get the parameters by getting the params array: event.event.params.
The params array will be in the same order as the params your event .json.
So in our case, event.event.params[0] will be the Sound File Path parameter, the next will be the volume parameter, and so on.
function onEvent(event) {
  if(event.event.name == "Play Sound")
  {
    // FlxG.sound.play(SoundFilePath, Volume, Looped)
    FlxG.sound.play(Paths.sound(event.event.params[0]), event.event.params[1], event.event.params[2]);
  }
}
And thats it! Whenever our new event Play Sound is ran, it will run this code inside onEvent and play the sound based on the parameters in the event.
Event packing
If you wish to make this all a bit more cleaner and share this event, you can pack the event.
Packing an event is pretty simple. Visit the event packer to pack your event into one .pack file.
This .pack file goes into ./data/events/ and will work identically to its unpacked version.

